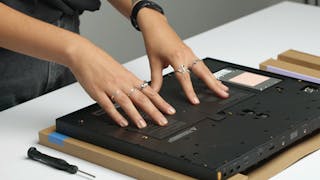
The Push upgrade process is designed to be easy enough to complete on your own, even if you have no experience with this kind of task. It should take you a maximum of 30 minutes.
Upgrade kit: step-by-step guide
Tutorial video
Watch this tutorial video for a walkthrough of the entire upgrade process.
Step by step guide
Follow these instructions to upgrade your Push 3 to a standalone instrument. If you run into any problems, you can check out our troubleshooting article for help.
Step 1: Prepare
- Prepare a clean, flat surface to work on.
- Lay everything out and check that you have all of the contents listed on the box.
👉 Leave the screws in their packaging until you’re instructed to use them.
- Place the provided mat on your work surface.
⚠️ Make sure your Push is turned off and the power supply is removed.
- Place your Push face-down on the mat.
⚠️ If you’re not already sitting, take a seat and wait for ten seconds – this will allow any electrostatic charge to dissipate.
Step 2: Unscrew backplate
- First, unscrew all the outer screws from the backplate with the provided screwdriver and set them aside.
- Next, unscrew the three smaller middle screws and keep them separate from the others.
Step 3: Remove hole covers and lift the backplate
- Remove the five hole covers from the backplate and dispose of them in an appropriate plastic recycling bin.
- Screw the backplate lifter into the hole below the left foot that’s furthest away from you, until you see the backplate start to rise.
- Put the backplate to one side.
Step 4: Insert the processor
- Hold the processor at a 45-degree angle and slide it into the top connector from the right-hand side.
- Guide the Wi-Fi antennas into their tracks.
Screw in the two provided processor screws. Note that these screws won’t be flush with the surface of the processor when screwed in correctly.
- Insert the top Wi-Fi antenna into the track by sliding your finger along the groove. Insert the plastic end piece into the top slot.
- If the slot feels tight, gently pull on the side wall of your Push to give the plastic end piece room to slide in.
- Repeat with the bottom Wi-Fi antenna.
- Carefully remove the film from the heat pad on the top of the processor.
Step 5: Insert the memory card
- Hold the memory card at a 30-degree angle and slide it into the connector from the right-hand side.
- With one hand, press the small plastic tab to the side.
- With the other hand, press down on the memory card until it clicks into place.
👉 Don’t be afraid to apply pressure.
Step 6: Insert the battery
- Remove the battery spacer and dispose of it in an appropriate plastic recycling bin.
- Insert the battery with the text facing up.
- Screw the battery screw into the hole on the right-hand side of the battery.
- Make sure to use the dedicated battery screw.
Step 7: Re-attach the backplate
- Position the backplate so that the three middle holes are on the bottom half.
- Place the backplate flat onto the back of your Push and start screwing the outer screws in just enough to bring the backplate into the frame.
- Tighten the outer screws until you meet resistance.
- Then, re-insert the three smaller middle screws.
Step 8: Attach heatsink
- Carefully remove the film from the heat pad on the heatsink.
Place the heatsink on the backplate, making sure you align the five holes.
Screw the five heatsink screws into the heatsink, tightening firmly.
Step 9: Getting started
- Turn your Push over so that it’s right-side up.
- Plug in your Push’s power supply. You’ll only need to do this to activate the battery the first time you power on your Push.
- Power on your Push.
👉It takes 2–3 minutes to turn on the first time.
- The first time you use your Push, you’ll need to perform an additional step to properly calibrate the battery. Charge it completely, and then unplug the power adaptor and use or leave Push on until the battery is fully discharged.
- When your Push powers on, follow the steps on the screen. Then, listen to our demo set and enjoy your standalone instrument.
