Menu
  • Live
  • Push
  • Move
  • Note
  • Link
  • Shop
  • Packs
  • Help
  • More
  • Try Live 12 for free
  • Log in or register

More on Ableton.com:

  • Blog
  • Ableton for the Classroom
  • Ableton for Colleges and Universities
  • Certified Training
  • About Ableton
  • Jobs
  • Apprenticeships

More from Ableton:

  • Loop

    Watch Talks, Performances and Features from Ableton's Summit for Music Makers

  • Learning Music

    Learn the fundamentals of music making right in your browser.

  • Learning Synths

    Get started with synthesis using a web-based synth and accompanying lessons.

  • Making Music

    Some tips from 74 Creative Strategies for Electronic Producers.

32. Synchronizing with Link, Tempo Follower, and MIDI

32.1 Synchronizing via Link

Ableton Link is a technology that keeps devices in time over a wired or wireless network. Link is built into Live as well as a growing number of iOS applications, and any Link-enabled software can play in time with any other Link-enabled software simply by joining the same network.

When using Link, you can start and stop playback of each device or application independently of every other connected device or application. Link-enabled software will remain in tempo as well as at the correct position in relation to the global launch quantization of all participants.

32.1.1 Setting up Link

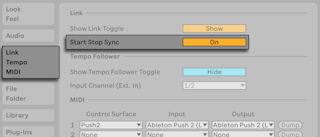
To configure Live to use Link, first make sure that your computer is connected to the same network as any other devices that you will use Link with. This can either be a local network or an ad-hoc (computer-to-computer) connection. Then open Live’s Link/Tempo/MIDI Preferences and enable the button next to “Show Link Toggle.”

Showing the Link Toggle in Live’s Preferences.

It is possible to sync start and stop commands across all connected apps that have Start Stop Sync enabled. To do this, click the button next to “Start Stop Sync”.

The Start Stop Sync Toggle in Live’s Preferences.

32.1.2 Using Link

The Link toggle in Live’s Control Bar will appear. Click to toggle Link on or off.

Link Toggle.

When on, the toggle will update to show the number of other Link-enabled apps or instances of Live that are on the same network.

Link Indicator Showing Another Connection.

If at least one other Link-enabled app or instance of Live is connected, the Arrangement Position display will show a moving “progress bar” whenever Live’s transport is not running. This bar is a representation of the Live Set’s global launch quantization in relation to that of the other participants in the Link session. After you trigger playback, Live will wait until this bar is filled before starting.

Arrangement Position Shows Relation to Link Timeline.

The first app or Live instance to join a Link session will set the initial tempo for the others. Any Link-enabled apps or instances of Live can then change their tempo at any time and all others will follow. If multiple participants try to change the tempo simultaneously, everyone else will try to follow, but the last one who changes the tempo will “win.”

Tempo changes made by any participant in a Link session will override tempo automation in your Live Set.

Note that the metronome’s recording count-in cannot be used when Link is enabled.

In most cases, Link will work without issues as soon as it is enabled and will provide reliable synchronization under all conditions. If you have further questions or run into issues, we recommend checking out the Link FAQ in the Knowledge Base.

32.2 Synchronizing via Tempo Follower

You might encounter situations where a Link connection or MIDI Clock are not available. Or, sometimes you might prefer not to use a rigid, computer-generated clock. For example, you might like Live’s tempo to follow the natural push and pull of a drummer in your band, or you might be trying to synchronize to a set of turntables during a DJ performance. This is where Tempo Follower comes in. Tempo Follower analyzes an incoming audio signal in real-time and interprets its tempo, allowing Live to follow along and keep in time.

32.2.1 Setting Up Tempo Follower

To set an external audio input as a source for Tempo Follower, first open Live’s Link/Tempo/MIDI Preferences. In the Tempo Follower section, set the Input Channel (Ext. In) to the input on your audio interface that is connected to the source you wish to follow. For a drum kit, this might be a dedicated overhead microphone. For turntables, you might choose to use a record output or effects loop from a DJ mixer. Note that while Tempo Follower’s algorithm is optimized for use with audio signals that have a clear rhythm, you can also be creative and experiment with different sources.

Tempo Follower Settings in Live’s Preferences.

When the “Show Tempo Follower Toggle” switch is set to “Show”, you will see a “Follow” button appear in the Control Bar, alongside the other tempo-related parameters, at the left-hand side.

The Follow Button in the Control Bar.

Activating the “Follow” button will turn on Tempo Follower, and Live will begin listening to the configured audio source and interpreting its tempo. (Note: Tempo Follower does not run when the Follow button is hidden.)

When Tempo Follower cannot be connected to the audio input device channel specified in the Preferences, the feature is disabled and the Follow button will appear grayed out.

Note: Link, Tempo Follower, and External Sync are mutually exclusive; the Link and the External Sync switches are disabled when Tempo Follower is enabled. Live can still send MIDI clock information to external devices when Tempo Follower is enabled, but it cannot receive it.

32.3 Synchronizing via MIDI

If you’re working with devices that don’t support Link, you can synchronize via MIDI. The MIDI protocol defines two ways to synchronize sequencers, both of which are supported by Live. Both protocols work with the notion of a sync host, which delivers a sync signal that is tracked by the sync device(s).

MIDI Clock: MIDI Clock works like a metronome ticking at a fast rate. The rate of the incoming ticks is tempo-dependent: Changing the tempo at the sync host (e.g., a drum machine) will cause the device to follow the change. The MIDI Clock protocol also provides messages that indicate the song position. With respect to MIDI Clock, Live can act as both a MIDI sync host and device.

MIDI Timecode: MIDI Timecode is the MIDI version of the SMPTE protocol, the standard means of synchronizing tape machines and computers in the audio and film industry. A MIDI Timecode message specifies a time in seconds and frames (subdivisions of a second). Live will interpret a Timecode message as a position in the Arrangement. Timecode messages carry no meter-related information; when slaving Live to another sequencer using MIDI Timecode, you will have to adjust the tempo manually. Tempo changes cannot be tracked. Detailed MIDI Timecode settings are explained later in this chapter. With respect to MIDI Timecode, Live can only act as a MIDI sync device, not a host.

32.3.1 Synchronizing External MIDI Devices to Live

Live can send MIDI Clock messages to an external MIDI sequencer (or drum machine). After connecting the sequencer to Live and setting it up to receive MIDI sync, turn the device on as a sync destination in Live’s Link/Tempo/MIDI Preferences.

Choosing a MIDI Device for Live.

The lower indicator LED next to the Control Bar’s EXT button will flash when Live is sending sync messages to external sequencers.

32.3.2 Synchronizing Live to External MIDI Devices

Live can be synchronized via MIDI to an external sequencer. After connecting the sequencer to Live and setting it up to send sync, use Live’s Link/Tempo/MIDI Preferences to tell Live about the connection.

Setting up Live as a MIDI Device.

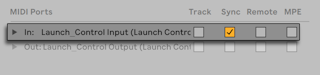
When an external sync source has been enabled, the EXT button appears in the Control Bar. You can then activate external sync either by switching on this button or by using the External Sync command in the Options menu. The upper indicator LED next to the EXT button will flash if Live receives useable sync messages.

The External Sync Switch.

When Live is synced to an external MIDI device, it can accept song position pointers from this device, syncing it not only in terms of tempo but in terms of its position in the song. If the host jumps to a new position within the song, Live will do the same. However, if the Control Bar’s Loop switch is activated, playback will be looped, and song position pointers will simply be “wrapped“ into the length of the loop.

Note: When Link is enabled, Live can send MIDI clock information to external devices, but cannot receive it; the External Sync switch is disabled when Link is enabled.

32.3.2.1 MIDI Timecode Options

Timecode options can be set up per MIDI device. Select a MIDI device from the Link/Tempo/MIDI Preferences’ MIDI Ports list to access the settings.

The MIDI Timecode Frame Rate setting is relevant only if “MIDI Timecode“ is chosen from the MIDI Sync Type menu. The MIDI Timecode Rate chooser selects the type of Timecode to which Live will synchronize. All of the usual SMPTE frame rates are available. When the Rate is set to “SMPTE All,“ Live will auto-detect the Timecode format of incoming sync messages and interpret the messages accordingly. Note that you can adjust the Timecode format that is used for display in the Arrangement View: Go to the Options menu, and then access the Time Ruler Format sub-menu.

The MIDI Timecode Offset setting is also only relevant if “MIDI Timecode“ is chosen from the Sync Type menu. You can specify a SMPTE time offset using this control. Live will interpret this value as the Arrangement’s start time.

32.3.3 Sync Delay

The Sync Delay controls, which are separately available for each MIDI device, allow you to delay Live’s internal time base against the sync signal. This can be useful in compensating for delays incurred by the signal transmission. The Sync Delay for a specific MIDI device appears as you select the MIDI device from the Link/Tempo/MIDI Preferences’ MIDI Ports list. To adjust the delay, have both Live and the other sequencer play a rhythmical pattern with pronounced percussive sounds. While listening to the output from both, adjust the Sync Delay control until both sounds are in perfect sync.

Adjusting Sync Delay.

Ableton Reference Manual

Version 11 | Version 12

Download PDF
  1. 1. Welcome to Live
    1. 1.1 The Ableton Team Says: Thank You
    2. 1.2 What’s New in Live 11
      1. 1.2.1 Ableton Cloud
      2. 1.2.2 Arrangement View Improvements
      3. 1.2.3 Browser Improvements
      4. 1.2.4 Capture MIDI Updates
      5. 1.2.5 Clip View Updates
      6. 1.2.6 Comping
      7. 1.2.7 CPU Meter Updates
      8. 1.2.8 Device Additions and Improvements
      9. 1.2.9 Follow Actions
      10. 1.2.10 Interface Improvements
      11. 1.2.11 Linked Track Editing
      12. 1.2.12 Max for Live Updates
      13. 1.2.13 MIDI Clip Scales
      14. 1.2.14 MIDI Note Editing
      15. 1.2.15 MPE Support and Editing
      16. 1.2.16 Multi-clip Editing
      17. 1.2.17 Plug-ins
      18. 1.2.18 Push 2 Device Visualizations
      19. 1.2.19 Push 2’s MIDI Clip Mode
      20. 1.2.20 Additional Push 1 and 2 Improvements
      21. 1.2.21 Rack and Macro Control Improvements
      22. 1.2.22 Session View Improvements
      23. 1.2.23 Setup Improvements
      24. 1.2.24 Tempo Follower
  2. 2. First Steps
    1. 2.1 Learn About Live
      1. 2.1.1 Using the Info View and Index
    2. 2.2 Setting up Preferences
      1. 2.2.1 Look | Feel
      2. 2.2.2 Audio
      3. 2.2.3 Link | Tempo | MIDI
      4. 2.2.4 File | Folder
      5. 2.2.5 Library
      6. 2.2.6 Plug-Ins
      7. 2.2.7 Record | Warp | Launch
      8. 2.2.8 Licenses | Maintenance
    3. 2.3 The Main Live Screen
  3. 3. Authorizing Live
    1. 3.1 Copy Protection FAQs
      1. 3.1.1 Can I Use Live or Other Ableton Products Without a Serial Number?
      2. 3.1.2 What if I Change My Computer’s Components?
      3. 3.1.3 Can I Authorize Live More than Once?
      4. 3.1.4 Can I Play my Set from a Computer That Is Not Authorized?
      5. 3.1.5 What Do I Do About Problems or Questions Regarding Copy Protection?
  4. 4. Live Concepts
    1. 4.1 The Browser
    2. 4.2 Live Sets
    3. 4.3 Arrangement and Session
    4. 4.4 Tracks
    5. 4.5 Audio and MIDI
    6. 4.6 Audio Clips and Samples
    7. 4.7 MIDI Clips and MIDI Files
    8. 4.8 Devices and the Mixer
    9. 4.9 Presets and Racks
    10. 4.10 Routing
    11. 4.11 Recording New Clips
    12. 4.12 Automation Envelopes
    13. 4.13 Clip Envelopes
    14. 4.14 MIDI and Key Remote
    15. 4.15 Saving and Exporting
  5. 5. Managing Files and Sets
    1. 5.1 Working with the Browser
      1. 5.1.1 Understanding the Browser’s Hierarchy
      2. 5.1.2 Downloading and Installing Packs in the Browser
      3. 5.1.3 User Folders
      4. 5.1.4 Searching for Files
    2. 5.2 Using Ableton Cloud
    3. 5.3 Sample Files
      1. 5.3.1 The Decoding Cache
      2. 5.3.2 Analysis Files (.asd)
      3. 5.3.3 Exporting Audio and Video
    4. 5.4 MIDI Files
      1. 5.4.1 Exporting MIDI Files
    5. 5.5 Live Clips
    6. 5.6 Live Sets
      1. 5.6.1 Creating, Opening and Saving Sets
      2. 5.6.2 Merging Sets
      3. 5.6.3 Exporting Session Clips as New Sets
      4. 5.6.4 Template Sets
      5. 5.6.5 Viewing and Changing a Live Set’s File References
    7. 5.7 Live Projects
      1. 5.7.1 Projects and Live Sets
      2. 5.7.2 Projects and Presets
      3. 5.7.3 Managing Files in a Project
    8. 5.8 Locating Missing Files
      1. 5.8.1 Manual Repair
      2. 5.8.2 Automatic Repair
    9. 5.9 Collecting External Files
      1. 5.9.1 Collect Files on Export
    10. 5.10 Aggregated Locating and Collecting
    11. 5.11 Finding Unused Files
    12. 5.12 Packing Projects into Packs
    13. 5.13 File Management FAQs
      1. 5.13.1 How Do I Create a Project?
      2. 5.13.2 How Can I Save Presets Into My Current Project?
      3. 5.13.3 Can I Work On Multiple Versions of a Set?
      4. 5.13.4 Where Should I Save My Live Sets?
      5. 5.13.5 Can I Use My Own Folder Structure Within a Project Folder?
  6. 6. Arrangement View
    1. 6.1 Navigation
    2. 6.2 Transport
    3. 6.3 Launching the Arrangement with Locators
    4. 6.4 Time Signature Changes
    5. 6.5 The Arrangement Loop
    6. 6.6 Moving and Resizing Clips
    7. 6.7 Audio Clip Fades and Crossfades
    8. 6.8 Selecting Clips and Time
    9. 6.9 Using the Editing Grid
    10. 6.10 Using the …Time Commands
    11. 6.11 Splitting Clips
    12. 6.12 Consolidating Clips
    13. 6.13 Linked-Track Editing
      1. 6.13.1 Linking and Unlinking Tracks
      2. 6.13.2 Editing Linked Tracks
  7. 7. Session View
    1. 7.1 Session View Clips
    2. 7.2 Tracks and Scenes
      1. 7.2.1 Editing Scene Tempo and Time Signature Values
      2. 7.2.2 Scene View
    3. 7.3 The Track Status Fields
    4. 7.4 Setting Up the Session View Grid
      1. 7.4.1 Select on Launch
      2. 7.4.2 Removing Clip Stop Buttons
      3. 7.4.3 Editing Scenes
    5. 7.5 Recording Sessions into the Arrangement
  8. 8. Clip View
    1. 8.1 The Clip Tabs/Panels
      1. 8.1.1 Clip Activator Switch
      2. 8.1.2 Clip View Sample Details
      3. 8.1.3 Clip Tabs/Clip Panels
      4. 8.1.4 Clip Name and Color
      5. 8.1.5 Clip Region/Loop and Display
      6. 8.1.6 Clip Signature
      7. 8.1.7 Clip Groove Chooser
      8. 8.1.8 Saving Default Audio Clip Settings with the Sample
      9. 8.1.9 MIDI Clip Scales
      10. 8.1.10 MIDI Clip Bank and Program Change
    2. 8.2 The Audio Tab/Panel
      1. 8.2.1 Warp Controls
      2. 8.2.2 Clip Start and End Fades
      3. 8.2.3 Clip RAM Mode
      4. 8.2.4 High Quality Interpolation
      5. 8.2.5 Clip Gain and Pitch
      6. 8.2.6 Destructive Sample Editing
      7. 8.2.7 Reversing Samples
      8. 8.2.8 Cropping Audio Clips
      9. 8.2.9 Replacing and Editing the Sample
    3. 8.3 The Notes Tab/Panel
    4. 8.4 Clip Defaults and Update Rate
  9. 9. Audio Clips, Tempo, and Warping
    1. 9.1 Tempo
      1. 9.1.1 Setting the Tempo
      2. 9.1.2 Tapping the Tempo
      3. 9.1.3 Nudging the Tempo
      4. 9.1.4 Clip Tempo Followers and Leaders
    2. 9.2 Warping
      1. 9.2.1 Warping Options in Preferences
      2. 9.2.2 Importing Samples
      3. 9.2.3 Warp Markers
      4. 9.2.4 Warping Short Samples
      5. 9.2.5 Auto-Warping Long Samples
      6. 9.2.6 Manipulating Grooves
      7. 9.2.7 Quantizing Audio
    3. 9.3 Warp Modes
      1. 9.3.1 Beats Mode
      2. 9.3.2 Tones Mode
      3. 9.3.3 Texture Mode
      4. 9.3.4 Re-Pitch Mode
      5. 9.3.5 Complex and Complex Pro Mode
  10. 10. Editing MIDI Notes and Velocities
    1. 10.1 Creating an Empty MIDI Clip
    2. 10.2 The MIDI Note Editor
    3. 10.3 MIDI Editor Navigation and Transport
    4. 10.4 Editing MIDI
      1. 10.4.1 Non-Destructive Editing
      2. 10.4.2 Scales, Folding and Looping
      3. 10.4.3 Grid Snapping
      4. 10.4.4 Editing Notes
      5. 10.4.5 Changing Note Length
      6. 10.4.6 The …Time Commands in the MIDI Editor
      7. 10.4.7 Quantizing Notes
      8. 10.4.8 Editing Velocities
      9. 10.4.9 Editing Probabilities
      10. 10.4.10 MIDI Note Stretch
      11. 10.4.11 Cropping MIDI Clips
      12. 10.4.12 Deactivating Notes
      13. 10.4.13 The Transform Tools
    5. 10.5 Multi-Clip Editing
      1. 10.5.1 Focus Mode
      2. 10.5.2 Editing in the Session View
      3. 10.5.3 Editing in the Arrangement View
  11. 11. Editing MPE
    1. 11.1 Viewing MPE Data
    2. 11.2 Editing MPE Data
    3. 11.3 Drawing Envelopes
    4. 11.4 MPE in Live’s Devices and on Push 2
    5. 11.5 MPE in External Plug-ins
    6. 11.6 MPE/Multi-channel Settings
      1. 11.6.1 Accessing the MPE/Multi-channel Settings Dialog
      2. 11.6.2 The MPE/Multi-Channel Settings Dialog
  12. 12. Converting Audio to MIDI
    1. 12.1 Slice to New MIDI Track
      1. 12.1.1 Resequencing Slices
      2. 12.1.2 Using Effects on Slices
    2. 12.2 Convert Harmony to New MIDI Track
    3. 12.3 Convert Melody to New MIDI Track
    4. 12.4 Convert Drums to New MIDI Track
    5. 12.5 Optimizing for Better Conversion Quality
  13. 13. Using Grooves
    1. 13.1 Groove Pool
      1. 13.1.1 Adjusting Groove Parameters
      2. 13.1.2 Committing Grooves
    2. 13.2 Editing Grooves
      1. 13.2.1 Extracting Grooves
    3. 13.3 Groove Tips
      1. 13.3.1 Grooving a Single Voice
      2. 13.3.2 Non-Destructive Quantization
      3. 13.3.3 Creating Texture With Randomization
  14. 14. Launching Clips
    1. 14.1 The Launch Controls
    2. 14.2 Launch Modes
    3. 14.3 Legato Mode
    4. 14.4 Clip Launch Quantization
    5. 14.5 Velocity
    6. 14.6 Clip Offset and Nudging
    7. 14.7 Follow Actions
      1. 14.7.1 Looping Parts of a Clip
      2. 14.7.2 Creating Cycles
      3. 14.7.3 Temporarily Looping Clips
      4. 14.7.4 Adding Variations in Sync
      5. 14.7.5 Mixing up Melodies and Beats
      6. 14.7.6 Creating Nonrepetitive Structures
  15. 15. Routing and I/O
    1. 15.1 Monitoring
    2. 15.2 External Audio In/Out
      1. 15.2.1 Mono/Stereo Conversions
    3. 15.3 External MIDI In/Out
      1. 15.3.1 The MIDI Ports List in the Preferences
      2. 15.3.2 Playing MIDI With the Computer Keyboard
      3. 15.3.3 Connecting External Synthesizers
      4. 15.3.4 MIDI In/Out Indicators
    4. 15.4 Resampling
    5. 15.5 Internal Routings
      1. 15.5.1 Internal Routing Points
      2. 15.5.2 Making Use of Internal Routing
  16. 16. Mixing
    1. 16.1 The Live Mixer
      1. 16.1.1 Session Mixer Features
    2. 16.2 Audio and MIDI Tracks
    3. 16.3 Group Tracks
    4. 16.4 Return Tracks and the Master Track
    5. 16.5 Using Live’s Crossfader
    6. 16.6 Soloing and Cueing
    7. 16.7 Track Delays
  17. 17. Recording New Clips
    1. 17.1 Choosing an Input
    2. 17.2 Arming (Record-Enabling) Tracks
    3. 17.3 Recording
      1. 17.3.1 Recording Into the Arrangement
      2. 17.3.2 Recording Into Session Slots
      3. 17.3.3 Overdub Recording MIDI Patterns
      4. 17.3.4 MIDI Step Recording
    4. 17.4 Recording in Sync
      1. 17.4.1 Metronome Settings
    5. 17.5 Recording Quantized MIDI Notes
    6. 17.6 Recording with Count-in
    7. 17.7 Setting up File Types
    8. 17.8 Where are the Recorded Samples?
    9. 17.9 Using Remote Control for Recording
    10. 17.10 Capturing MIDI
      1. 17.10.1 Starting a New Live Set
      2. 17.10.2 Adding Material to an Existing Live Set
  18. 18. Comping
    1. 18.1 Take Lanes
    2. 18.2 Inserting and Managing Take Lanes
    3. 18.3 Recording Takes
    4. 18.4 Inserting Samples
    5. 18.5 Auditioning Take Lanes
    6. 18.6 Creating a Comp
    7. 18.7 Source Highlights
  19. 19. Working with Instruments and Effects
    1. 19.1 Using the Live Devices
      1. 19.1.1 Live Device Presets
    2. 19.2 Using Plug-Ins
      1. 19.2.1 Plug-Ins in the Device View
      2. 19.2.2 Sidechain Parameters
    3. 19.3 VST Plug-Ins
      1. 19.3.1 The VST Plug-In Folder
      2. 19.3.2 VST Presets and Banks
    4. 19.4 Audio Units Plug-Ins
    5. 19.5 Device Delay Compensation
  20. 20. Instrument, Drum and Effect Racks
    1. 20.1 An Overview of Racks
      1. 20.1.1 Signal Flow and Parallel Device Chains
      2. 20.1.2 Macro Controls
    2. 20.2 Creating Racks
    3. 20.3 Looking at Racks
    4. 20.4 Chain List
      1. 20.4.1 Auto Select
    5. 20.5 Zones
      1. 20.5.1 Signal Flow through Zones
      2. 20.5.2 Key Zones
      3. 20.5.3 Velocity Zones
      4. 20.5.4 Chain Select Zones
    6. 20.6 Drum Racks
      1. 20.6.1 Pad View
    7. 20.7 Using the Macro Controls
      1. 20.7.1 Map Mode
      2. 20.7.2 Randomizing Macro Controls
      3. 20.7.3 Macro Control Variations
    8. 20.8 Mixing With Racks
      1. 20.8.1 Extracting Chains
  21. 21. Automation and Editing Envelopes
    1. 21.1 Recording Automation in Arrangement View
    2. 21.2 Recording Automation in Session View
      1. 21.2.1 Session Automation Recording Modes
    3. 21.3 Deleting Automation
    4. 21.4 Overriding Automation
    5. 21.5 Drawing and Editing Automation
      1. 21.5.1 Drawing Envelopes
      2. 21.5.2 Editing Breakpoints
      3. 21.5.3 Stretching and Skewing Envelopes
      4. 21.5.4 Simplifying Envelopes
      5. 21.5.5 Inserting Automation Shapes
      6. 21.5.6 Locking Envelopes
      7. 21.5.7 Edit Menu Commands
      8. 21.5.8 Editing the Tempo Automation
  22. 22. Clip Envelopes
    1. 22.1 The Clip Envelope Editor
    2. 22.2 Audio Clip Envelopes
      1. 22.2.1 Clip Envelopes are Non-Destructive
      2. 22.2.2 Changing Pitch and Tuning per Note
      3. 22.2.3 Muting or Attenuating Notes in a Sample
      4. 22.2.4 Scrambling Beats
      5. 22.2.5 Using Clips as Templates
    3. 22.3 Mixer and Device Clip Envelopes
      1. 22.3.1 Modulating Mixer Volumes and Sends
      2. 22.3.2 Modulating Pan
      3. 22.3.3 Modulating Device Controls
    4. 22.4 MIDI Controller Clip Envelopes
    5. 22.5 Unlinking Clip Envelopes From Clips
      1. 22.5.1 Programming a Fade-Out for a Live Set
      2. 22.5.2 Creating Long Loops from Short Loops
      3. 22.5.3 Imposing Rhythm Patterns onto Samples
      4. 22.5.4 Clip Envelopes as LFOs
      5. 22.5.5 Warping Linked Envelopes
  23. 23. Working with Video
    1. 23.1 Importing Video
    2. 23.2 The Appearance of Video in Live
      1. 23.2.1 Video Clips in the Arrangement View
      2. 23.2.2 The Video Window
      3. 23.2.3 Clip View
    3. 23.3 Matching Sound to Video
    4. 23.4 Video Trimming Tricks
  24. 24. Live Audio Effect Reference
    1. 24.1 Amp
      1. 24.1.1 Amp Tips
    2. 24.2 Auto Filter
    3. 24.3 Auto Pan
    4. 24.4 Beat Repeat
    5. 24.5 Cabinet
      1. 24.5.1 Cabinet Tips
    6. 24.6 Channel EQ
      1. 24.6.1 Channel EQ Tips
    7. 24.7 Chorus
    8. 24.8 Chorus-Ensemble
      1. 24.8.1 Chorus-Ensemble Tips
    9. 24.9 Compressor
      1. 24.9.1 Sidechain Parameters
      2. 24.9.2 Compressor Tips
    10. 24.10 Corpus
      1. 24.10.1 Resonator Parameters
      2. 24.10.2 LFO Section
      3. 24.10.3 Filter Section
      4. 24.10.4 Global Parameters
      5. 24.10.5 Sidechain Parameters
    11. 24.11 Delay
      1. 24.11.1 Delay Tips
    12. 24.12 Drum Buss
    13. 24.13 Dynamic Tube
    14. 24.14 Echo
      1. 24.14.1 Echo Tab
      2. 24.14.2 Modulation Tab
      3. 24.14.3 Character Tab
      4. 24.14.4 Global Controls
    15. 24.15 EQ Eight
    16. 24.16 EQ Three
    17. 24.17 Erosion
    18. 24.18 External Audio Effect
    19. 24.19 Filter Delay
    20. 24.20 Flanger
    21. 24.21 Frequency Shifter
      1. 24.21.1 Frequency Shifter Tips
    22. 24.22 Gate
    23. 24.23 Glue Compressor
      1. 24.23.1 Sidechain Parameters
    24. 24.24 Grain Delay
    25. 24.25 Hybrid Reverb
      1. 24.25.1 Signal Flow
      2. 24.25.2 Input Section
      3. 24.25.3 Convolution Reverb Engine
      4. 24.25.4 Algorithmic Reverb Engine
      5. 24.25.5 EQ Section
      6. 24.25.6 Output Section
    26. 24.26 Limiter
    27. 24.27 Looper
      1. 24.27.1 Feedback Routing
    28. 24.28 Multiband Dynamics
      1. 24.28.1 Dynamics Processing Theory
      2. 24.28.2 Interface and Controls
      3. 24.28.3 Sidechain Parameters
      4. 24.28.4 Multiband Dynamics Tips
    29. 24.29 Overdrive
    30. 24.30 Pedal
      1. 24.30.1 Pedal Tips
    31. 24.31 Phaser
    32. 24.32 Phaser-Flanger
    33. 24.33 Redux
      1. 24.33.1 Downsampling
      2. 24.33.2 Bit Reduction
    34. 24.34 Redux Legacy
    35. 24.35 Resonators
    36. 24.36 Reverb
      1. 24.36.1 Input Filter
      2. 24.36.2 Early Reflections
      3. 24.36.3 Diffusion Network
      4. 24.36.4 Chorus
      5. 24.36.5 Global Settings
      6. 24.36.6 Output
    37. 24.37 Saturator
    38. 24.38 Shifter
      1. 24.38.1 Tuning and Delay Section
      2. 24.38.2 LFO Section
      3. 24.38.3 Envelope Follower Section
      4. 24.38.4 Shifter Mode Section
      5. 24.38.5 Sidechain Parameters
      6. 24.38.6 Shifter Tips
    39. 24.39 Spectral Resonator
      1. 24.39.1 Spectral Resonator Tips
    40. 24.40 Spectral Time
      1. 24.40.1 Freezer Section
      2. 24.40.2 Delay Section
      3. 24.40.3 Resolution Section
      4. 24.40.4 Global Controls
    41. 24.41 Spectrum
    42. 24.42 Tuner
      1. 24.42.1 View Switches
      2. 24.42.2 Classic View
      3. 24.42.3 Histogram View
      4. 24.42.4 Note Spellings
      5. 24.42.5 Reference Slider
    43. 24.43 Utility
    44. 24.44 Vinyl Distortion
    45. 24.45 Vocoder
      1. 24.45.1 Vocoder Tips
  25. 25. Live MIDI Effect Reference
    1. 25.1 Arpeggiator
      1. 25.1.1 Style and Rate Sections
      2. 25.1.2 Transposition and Velocity Sections
    2. 25.2 Chord
    3. 25.3 Note Length
    4. 25.4 Pitch
    5. 25.5 Random
    6. 25.6 Scale
    7. 25.7 Velocity
  26. 26. Live Instrument Reference
    1. 26.1 Analog
      1. 26.1.1 Architecture and Interface
      2. 26.1.2 Oscillators
      3. 26.1.3 Noise Generator
      4. 26.1.4 Filters
      5. 26.1.5 Amplifiers
      6. 26.1.6 Envelopes
      7. 26.1.7 LFOs
      8. 26.1.8 Global Parameters
      9. 26.1.9 MPE Sources
    2. 26.2 Collision
      1. 26.2.1 Architecture and Interface
      2. 26.2.2 Mallet Section
      3. 26.2.3 Noise Section
      4. 26.2.4 Resonator Tabs
      5. 26.2.5 LFO Tab
      6. 26.2.6 MIDI/MPE Tab
      7. 26.2.7 Sound Design Tips
    3. 26.3 Drift
      1. 26.3.1 Subtractive Synthesis
      2. 26.3.2 Oscillator Section
      3. 26.3.3 Filter Section
      4. 26.3.4 Envelopes Section
      5. 26.3.5 LFO Section
      6. 26.3.6 Mod Section
      7. 26.3.7 Global Section
    4. 26.4 Electric
      1. 26.4.1 Architecture and Interface
      2. 26.4.2 Hammer Section
      3. 26.4.3 Fork Section
      4. 26.4.4 Damper/Pickup Section
      5. 26.4.5 Global Section
    5. 26.5 External Instrument
    6. 26.6 Impulse
      1. 26.6.1 Sample Slots
      2. 26.6.2 Start, Transpose and Stretch
      3. 26.6.3 Filter
      4. 26.6.4 Saturator and Envelope
      5. 26.6.5 Pan and Volume
      6. 26.6.6 Global Controls
      7. 26.6.7 Individual Outputs
    7. 26.7 Operator
      1. 26.7.1 General Overview
      2. 26.7.2 Oscillator Section
      3. 26.7.3 LFO Section
      4. 26.7.4 Envelopes
      5. 26.7.5 Filter Section
      6. 26.7.6 Global Controls
      7. 26.7.7 Glide and Spread
      8. 26.7.8 Strategies for Saving CPU Power
      9. 26.7.9 Finally…
      10. 26.7.10 The Complete Parameter List
    8. 26.8 Sampler
      1. 26.8.1 Getting Started with Sampler
      2. 26.8.2 Multisampling
      3. 26.8.3 Title Bar Options
      4. 26.8.4 Sampler’s Tabs
      5. 26.8.5 The Zone Tab
      6. 26.8.6 The Sample Tab
      7. 26.8.7 The Pitch/Osc Tab
      8. 26.8.8 The Filter/Global Tab
      9. 26.8.9 The Modulation Tab
      10. 26.8.10 The MIDI Tab
      11. 26.8.11 Importing Third-Party Multisamples
    9. 26.9 Simpler
      1. 26.9.1 Playback Modes
      2. 26.9.2 Warp Controls
      3. 26.9.3 Filter
      4. 26.9.4 Envelopes
      5. 26.9.5 LFO
      6. 26.9.6 Global Parameters
      7. 26.9.7 Context Menu Options
      8. 26.9.8 Strategies for Saving CPU Power
    10. 26.10 Tension
      1. 26.10.1 Architecture and Interface
      2. 26.10.2 String Tab
      3. 26.10.3 Filter/Global Tab
      4. 26.10.4 Sound Design Tips
    11. 26.11 Wavetable
      1. 26.11.1 Wavetable Synthesis
      2. 26.11.2 Oscillators
      3. 26.11.3 Sub Oscillator
      4. 26.11.4 Filters
      5. 26.11.5 Matrix Tab
      6. 26.11.6 Mod Sources Tab
      7. 26.11.7 MIDI Tab
      8. 26.11.8 Global and Unison Controls
      9. 26.11.9 Hi-Quality Mode
  27. 27. Max for Live
    1. 27.1 Setting Up Max for Live
    2. 27.2 Using Max for Live Devices
    3. 27.3 Editing Max for Live Devices
    4. 27.4 Max Dependencies
    5. 27.5 Learning Max Programming
  28. 28. Max for Live Devices
    1. 28.1 Max for Live Instruments
      1. 28.1.1 DS Clang
      2. 28.1.2 DS Clap
      3. 28.1.3 DS Cymbal
      4. 28.1.4 DS FM
      5. 28.1.5 DS HH
      6. 28.1.6 DS Kick
      7. 28.1.7 DS Sampler
      8. 28.1.8 DS Snare
      9. 28.1.9 DS Tom
    2. 28.2 Max for Live Audio Effects
      1. 28.2.1 Align Delay
      2. 28.2.2 Envelope Follower
      3. 28.2.3 LFO
      4. 28.2.4 Shaper
    3. 28.3 Max for Live MIDI Effects
      1. 28.3.1 Envelope MIDI
      2. 28.3.2 Expression Control
      3. 28.3.3 MIDI Monitor
      4. 28.3.4 MPE Control
      5. 28.3.5 Note Echo
      6. 28.3.6 Shaper MIDI
  29. 29. MIDI and Key Remote Control
    1. 29.1 MIDI Remote Control
      1. 29.1.1 Natively Supported Control Surfaces
      2. 29.1.2 Manual Control Surface Setup
      3. 29.1.3 Takeover Mode
    2. 29.2 The Mapping Browser
      1. 29.2.1 Assigning MIDI Remote Control
      2. 29.2.2 Mapping to MIDI Notes
      3. 29.2.3 Mapping to Absolute MIDI Controllers
      4. 29.2.4 Mapping to Relative MIDI Controllers
      5. 29.2.5 Computer Keyboard Remote Control
  30. 30. Using Push 1
    1. 30.1 Setup
    2. 30.2 Browsing and Loading Sounds
    3. 30.3 Playing and Programming Beats
      1. 30.3.1 Loop Selector
      2. 30.3.2 16 Velocities Mode
      3. 30.3.3 64-Pad Mode
      4. 30.3.4 Loading Individual Drums
      5. 30.3.5 Step Sequencing Beats
      6. 30.3.6 Real-time Recording
      7. 30.3.7 Fixed Length Recording
    4. 30.4 Additional Recording Options
      1. 30.4.1 Recording with Repeat
      2. 30.4.2 Quantizing
    5. 30.5 Playing Melodies and Harmonies
      1. 30.5.1 Playing in Other Keys
    6. 30.6 Step Sequencing Melodies and Harmonies
      1. 30.6.1 Adjusting the Loop Length
    7. 30.7 Melodic Sequencer + 32 Notes
      1. 30.7.1 32 Notes
      2. 30.7.2 Sequencer
    8. 30.8 Navigating in Note Mode
    9. 30.9 Controlling Live’s Instruments and Effects
    10. 30.10 Mixing with Push 1
    11. 30.11 Recording Automation
    12. 30.12 Step Sequencing Automation
      1. 30.12.1 Note-Specific Parameters
      2. 30.12.2 Per-Step Automation
    13. 30.13 Controlling Live’s Session View
      1. 30.13.1 Session Overview
    14. 30.14 Setting User Preferences
    15. 30.15 Push 1 Control Reference
  31. 31. Using Push 2
    1. 31.1 Setup
    2. 31.2 Browsing and Loading Sounds
    3. 31.3 Playing and Programming Beats
      1. 31.3.1 Loop Selector
      2. 31.3.2 16 Velocities Mode
      3. 31.3.3 64-Pad Mode
      4. 31.3.4 Loading Individual Drums
      5. 31.3.5 Step Sequencing Beats
      6. 31.3.6 Real-time Recording
      7. 31.3.7 Fixed Length Recording
    4. 31.4 Additional Recording Options
      1. 31.4.1 Recording with Repeat
      2. 31.4.2 Quantizing
      3. 31.4.3 Arrangement Recording
    5. 31.5 Playing Melodies and Harmonies
      1. 31.5.1 Playing in Other Keys
    6. 31.6 Step Sequencing Melodies and Harmonies
      1. 31.6.1 Adjusting the Loop Length
    7. 31.7 Melodic Sequencer + 32 Notes
      1. 31.7.1 32 Notes
      2. 31.7.2 Sequencer
    8. 31.8 Working with Samples
      1. 31.8.1 Classic Playback Mode
      2. 31.8.2 One-Shot Mode
      3. 31.8.3 Slicing Mode
    9. 31.9 Navigating in Note Mode
    10. 31.10 Working With Instruments and Effects
      1. 31.10.1 Adding, Deleting, and Reordering Devices
      2. 31.10.2 Working with Racks
    11. 31.11 Track Control And Mixing
      1. 31.11.1 Rack and Group Track Mixing
    12. 31.12 Recording Automation
    13. 31.13 Step Sequencing Automation
    14. 31.14 Clip Mode
      1. 31.14.1 Using MIDI Tracks in Clip Mode
      2. 31.14.2 Real-Time Playing Layouts
      3. 31.14.3 Sequencing Layouts
      4. 31.14.4 Note-Specific Parameters
    15. 31.15 Controlling Live’s Session View
      1. 31.15.1 Session Overview
    16. 31.16 Setup Menu
    17. 31.17 Push 2 Control Reference
  32. 32. Synchronizing with Link, Tempo Follower, and MIDI
    1. 32.1 Synchronizing via Link
      1. 32.1.1 Setting up Link
      2. 32.1.2 Using Link
    2. 32.2 Synchronizing via Tempo Follower
      1. 32.2.1 Setting Up Tempo Follower
    3. 32.3 Synchronizing via MIDI
      1. 32.3.1 Synchronizing External MIDI Devices to Live
      2. 32.3.2 Synchronizing Live to External MIDI Devices
      3. 32.3.3 Sync Delay
  33. 33. Computer Audio Resources and Strategies
    1. 33.1 Managing the CPU Load
      1. 33.1.1 The CPU Load Meter
      2. 33.1.2 CPU Load from Multichannel Audio
      3. 33.1.3 CPU Load from Tracks and Devices
      4. 33.1.4 Track Freeze
    2. 33.2 Managing the Disk Load
  34. 34. Audio Fact Sheet
    1. 34.1 Testing and Methodology
    2. 34.2 Neutral Operations
      1. 34.2.1 Undithered Rendering
      2. 34.2.2 Matching sample rate/no transposition
      3. 34.2.3 Unstretched Beats/Tones/Texture/Re-Pitch Warping
      4. 34.2.4 Summing at Single Mix Points
      5. 34.2.5 Recording external signals (bit depth >/= A/D converter)
      6. 34.2.6 Recording internal sources at 32 bit
      7. 34.2.7 Freeze, Flatten
      8. 34.2.8 Bypassed Effects
      9. 34.2.9 Routing
      10. 34.2.10 Splitting Clips
    3. 34.3 Non-Neutral Operations
      1. 34.3.1 Playback in Complex and Complex Pro Mode
      2. 34.3.2 Sample rate conversion/transposition
      3. 34.3.3 Volume Automation
      4. 34.3.4 Dithering
      5. 34.3.5 Recording external signals (bit depth < A/D converter)
      6. 34.3.6 Recording internal sources below 32 bit
      7. 34.3.7 Consolidate
      8. 34.3.8 Clip fades
      9. 34.3.9 Panning
      10. 34.3.10 Grooves
    4. 34.4 Tips for Achieving Optimal Sound Quality in Live
    5. 34.5 Conclusion
  35. 35. MIDI Fact Sheet
    1. 35.1 Ideal MIDI Behavior
    2. 35.2 MIDI Timing Problems
    3. 35.3 Live’s MIDI Solutions
    4. 35.4 Variables Outside of Live’s Control
    5. 35.5 Tips for Achieving Optimal MIDI Performance
    6. 35.6 Summary and Conclusions
  36. 36. Live Keyboard Shortcuts
    1. 36.1 Showing and Hiding Views
    2. 36.2 Working with Sets and the Program
    3. 36.3 Working with Devices and Plug-Ins
    4. 36.4 Editing
    5. 36.5 Adjusting Values
    6. 36.6 Commands for Breakpoint Envelopes
    7. 36.7 Loop Brace and Start/End Markers
    8. 36.8 Zooming, Display and Selections
    9. 36.9 Clip View Tabs/Panels
    10. 36.10 Clip View Sample Editor
    11. 36.11 Clip View MIDI Note Editor
    12. 36.12 Grid Snapping and Drawing
    13. 36.13 Global Quantization
    14. 36.14 Session View
    15. 36.15 Arrangement View
    16. 36.16 Commands for Tracks
    17. 36.17 Comping
    18. 36.18 Transport
    19. 36.19 Audio Engine
    20. 36.20 Browser
    21. 36.21 Key/MIDI Map Mode and the Computer MIDI Keyboard
    22. 36.22 Accessing Menus
    23. 36.23 Using Live’s Context Menu
  37. 37. Credits
Ableton
  • Register Live, Push or Move
  • About Ableton
  • Jobs

Education

  • Offers for students and teachers
  • Ableton for the Classroom
  • Ableton for Colleges and Universities

Community

  • Find Ableton User Groups
  • Find Certified Training
  • Become a Certified Trainer

Language and Location

Contact UsPress ResourcesLegal InfoCorporate InformationPrivacy PolicyCookie SettingsImprint
Ableton - Made in BerlinMade in Berlin